Posts

Showing posts from June, 2022

Ways to Serve Grated Bottarga

Image
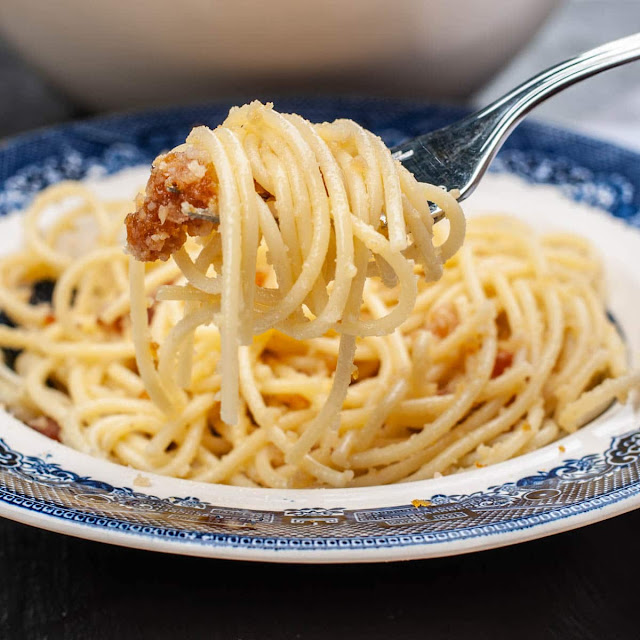
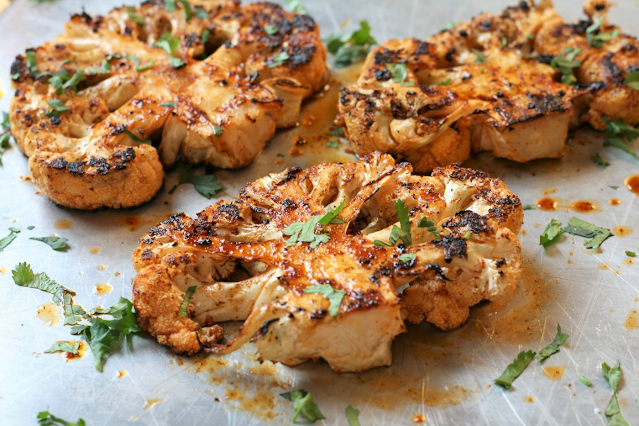
  Bottarga is ideal to eat unrefined, or used to top cooked game plans, basically like decorations of flakey sea salt. Emphatically prepared, a limited quantity bottarga has a gigantic effect, so it's best ground on a microplane or pitifully cut using a mandoline. In case it's excessively fragile to try and think about crushing, make a pass at freezing. 1. Sprinkled with lemon juice to cut the sharpness. 2. Pitifully cut or ground with bread and extra-virgin olive oil or margarine, for instance, with an Italian flatbread called carta da musica. 3. Ground with basics. 4. Ground over still to some degree firm pasta dishes, for instance, Chef Thomas Keller's spaghetti aglio e olio, or spaghetti alla bottarga, with lemon punch, breadcrumbs, and olive oil. 5. On extravagant, rich broiled eggs. 6. On immaculately cooked risotto. 7. Over vegetables like unrefined celery or steamed broccoli or cauliflower. 8. In a cherry tomato salad. Say ‘NO’ to meal prepping, cooking, kitchen cle

Different Kinds of Bottarga

Image
Italian bottarga di muggine is prestigious for its delicate flavor and little, oval orange sacs, yet it's apparently not by any means the only kind of bottarga out there: 1. Sicilian bottarga di tonno is created utilizing bluefin fish. It's saltier, fishier, and gentler than faint mullet bottarga, and it is by all accounts a huge faint block. Yellowfin fish bottarga is in like manner open in specific business areas. 2. Spanish bottarga can be created utilizing the roe of bonito, dull drum, and typical ling. 3. In Norway, bottarga is created utilizing North Atlantic cod. 4. In Japan and China, reestablished mullet roe is known as karasumi. It's sun-dried for a more restricted proportion of time than the Italian stuff, giving it a milder surface. 5. Korean eoran comes from mullet, freshwater drum, or coaker. It's marinated in soy sauce brushed with sesame oil during the drying framework. Say ‘NO’ to meal prepping, cooking, kitchen cleaning, and grocery shopping goes with

Sweet Potato Pie

Image
 For the locally developed pie crust: 2 cups normal flour 1 teaspoon salt 1 tablespoon sugar 1 cup unsalted spread, cut into little shapes and chilled 3 tablespoons ice water 1 tablespoon refined white vinegar or squeezed apple vinegar 1 egg beaten with 1 tablespoon water For the sweet potato filling: 2 gigantic sweet potatoes 1 tablespoon unsalted spread, mellowed 3 colossal eggs, beaten ½ cup profound cream 1 tablespoon natural shaded sugar ½ teaspoon vanilla concentrate 1 teaspoon ground cinnamon ½ teaspoon ground nutmeg ½ teaspoon ground ginger ½ teaspoon salt Whipped cream, to serve (optional) 1 Make the pie crust. In a colossal mixing bowl, join the flour, salt, and sugar. Add the infection spread to the flour mix, and work it between your fingers until the blend seems to be coarse pieces and there are no colossal pieces left. The combination should just hold together when pressed in an unassuming pack. 2 Turn the hitter out onto a flawless work surface, and add the infection wat

Tips for Making Vegan Mushroom Stew

Image
This liberal mushroom stew is a nice dish that coordinates well with caramelized onions and garlic. The following are a couple of clues to consider while making vegan mushroom stew: 1. Use various mushrooms. You can make mushroom stew with a blend of mushroom combinations, from significant wild mushrooms — like chanterelles, morels, or shellfish mushrooms — to the created mushrooms you track down in the grocery store. Using a mix considers an all the more impressive flavor profile; shiitakes, button mushrooms, cremini mushrooms, and portobello mushrooms convey different surfaces and flavors to the dish. 2. Use a multi-cooker to save time. To achieve a smooth, sauce like consistency in an irrelevant piece of the time, make the without gluten stew in a multi-cooker. Before adding the trimmings to the slow cooker, brown the onions and mushrooms on the sauté setting as you would on the burner or let the flavors converge for the time being in a lazy cooker. 3. Serve nearby Side dishes. Serv

Cauliflower Steak

Image
  1 ounce dried porcini mushrooms 2 cups water, notwithstanding 2 tablespoons 2 tablespoons customary flour or cornstarch 3 tablespoons extra-virgin olive oil 1 yellow onion, diced ¼ teaspoon smoked paprika ¼ teaspoon oregano Authentic salt and dim pepper, to taste 2 pounds gathered mushrooms, torn or cut into identical downsized pieces 3 garlic cloves, minced 1 tablespoon tomato stick 2 tablespoons soy sauce, liquid aminos, or tamari 1 pack new thyme 1 sound leaf ¼ cup white wine, red wine, or port 1 cup new parsley and chives, finely hacked, for brighten ¼ teaspoon red pepper chips (optional) 1 Place the dried porcinis in a glass assessing cup and cover them with 2 cups of gurgling water to make the stock. Permit the mushrooms to sit in the water for something like 10 minutes to rehydrate. (Of course, you can use 2 cups of vegetable stock in case you don't have dried porcinis accessible.) 2 Kill the porcinis with an opened spoon, finely divide them, and spot them in a little bowl

Cauliflower Steak

Image
 Trimmings 1 head of cauliflower ½ cup of extra-virgin olive oil 1 teaspoon of paprika ½ teaspoon of curry powder 2 garlic cloves, ground 1 teaspoon of cumin seed ¾ teaspoon of fit salt Recently ground dull pepper 1 Preheat the oven to 400°F. 2 Kill the outside leaves of the cauliflower and trim away the stem end. Balance the head upstanding on its base, and progressively cut 2 thick "steaks" around 1 ½-2 drags across, down the point of convergence of the cauliflower through the middle. (A singular cauliflower head usually contains around 2 extraordinary assessed steaks — save any overabundance florets for another usage, like cauliflower rice.) 3 In a little bowl, combine the olive oil, paprika, curry powder, garlic, cumin, salt, and two or three great wrenches of pepper. Mix well to incorporate. 4 Put steaks on a baking sheet or a cast-iron skillet, and shower with oil mix, warily covering the different sides. 5 Sear the steaks, flipping somewhat through until cauliflower is

What to Present With Cauliflower Steak

Image
Cauliflower tastes delicate profile, which makes it the best vehicle for huge, extraordinary reinforcements. 1. Chimichurri or romesco: A splendid, acidic sauce with new flavors, garlic, and lemon, or a good blend of tomatoes, stewed peppers, and toasted nuts are both mind blowing decisions to give a sensitive cauliflower steak. Sort out some way to make chimichurri in our recipe here. 2. Greek yogurt and shielded lemon: Pair the consumed, stewed edges of the cauliflower with a swoosh of cool, rich yogurt cut with ejections of insane lemon flavor. 3. Seared dates and developed balsamico: Slice a ½ cup of pitted dates fifty, and add to the stewing skillet with the cauliflower for the last 5-7 minutes of its cook time. Inside two or three minutes, the dates will begin to break down and caramelize, adding a significant note of enjoyableness to each eat. Sprinkle with a tart developed balsamic vinegar to complete the mentality. 4. Smooth cheddar sauce: Serve steaks on a blend of whole milk

6 Palatable Pieces of a Chicken

Image
1. The Whole Bird: Sometimes, the best cut is all of them. A seared chicken is potentially of life's most un-troublesome euphoria. Brush the chicken with made sense of spread and season all sides with salt, then, at that point, sear in a 475°F oven for 20-25 minutes. Reduce force to 400°F and continue to cook another 30-45 minutes, until thighs and focal point of chest registers 160°F and the juices run clear. Let rest something like 20 minutes preceding cutting. 2. Chicken Breasts: The chicken chest is a lean cut of meat taken from the pectoral muscle on the underside of the chicken. Each whole chicken contains one chicken chest with two sections, which are routinely detached during the butchering framework and sold as individual chests. Given its positive white meat and clinical benefits, boneless, skinless chicken chest meat is the most exorbitant cut of chicken conversely, with chicken thighs, wings, and drumsticks, and can be grilled, ready, cooked, burned, barbecued, and rose

How Are Pine Nuts Harvested?

Image
Pine trees expect close to 25 years to attempt to begin making tasteful seeds — significantly longer to stay aware of solid creation — and a respectable bigger piece of pine nuts are gathered the most difficult way possible. The gathering framework for pine nuts is phenomenally work concentrated, which is reflected in their extravagant expense point. Pine nuts are found in the pine cone: There are around two pine pieces under each pine cone scale. To simplify it to pry the seeds from the more immovably squeezed cones, they are placed in a burlap pack and left to dry out in the sun for under a month, to convince the scales open. The seeds are then taken out by hand from each cone. The last push toward the procuring framework is shelling: Like pistachios, each pine nut is encased inside an outside shell that ought to be taken out. What Do Pine Nuts Taste Like? Pine nuts have a fragile, nutty flavor with an inclination of charm, similar to cashews. An extreme taste can similarly be a sign

Where Do Pine Nuts Come From?

Image
Pine nuts are acquired from pine trees all around the planet. There are around 20 varieties of pine trees with seeds adequately enormous to harvest. The four most typical are the Mexican pinyon (Pinus cembroides), the Colorado pinion (Pinus edulis), the Italian or Mediterranean stone pine (Pinus pinea), and Chinese nut pine (Pinus armandii), but there are Siberian and Korean pines, too. Afghanistan is one of the greatest exporters of pine nuts in the world, behind Russia, Mongolia, China, and Korea. In the United States, there are even guidelines connecting with the procure of pine nuts. In Nevada, settlements guarantee explicit Native American groups a specific right to harvest. In New Mexico, "piñon" is used exclusively for sorts of local pines. How Are Pine Nuts Harvested? Pine trees expect something like 25 years to attempt to begin conveying edible seeds — significantly longer to stay aware of dependable creation — and a good bigger piece of pine nuts are gathered physic

5 Methods for utilizing Pine Nuts

Image
 The rich, sweet sort of pine nuts fits different game plans: 1. Pesto sauce: Pine nuts are most often associated with their part in upgrading pesto. When gotten together with new, peppery basil, verdant olive oil, and garlic, pine nuts add an unassuming nuttiness and thick, smooth surface. 2. Leafy greens: Pine nuts are intrinsically smooth, so toasting them is a rapid and basic technique for heightening their flavor for a more unquestionable snack. Add pine nuts to servings of leafy greens for a gentler crush than almonds. 3. Plunges: Toasted pine nuts make an unprecedented fixing on any spread of welcoming dives or mezzes, yet they can similarly be incorporated into hummus or white bean plunge for somewhat added surface. 4. Treats: The sensitive consistency and warm, nutty sort of pine nuts makes an unprecedented extension to delicate, rich tart exterior — especially when stood apart from an impressive filling, like Chef Thomas Keller's lemon sabayon tart with a pine nut cake co

Tips for Making Perfect Ravioli

Image
There are different methods for making new pasta. These three clues will guarantee an amazing gathering of ravioli: 1. Seal the edges. Not at all like tortellini, another pasta shape that relies upon falling to seal its things inside, ravioli are best fixed with a bit of water preceding being cut with a wrinkling style pasta shaper or paring edge. Fixing the pasta with water ensures that the completing won't spill up in the cooking framework. 2. Overlay the player into a feeble sheet. The more thin the combination, the more delicate and shrewd the pasta will be. As the natural proverb goes, you should have the choice to examine the paper through a sheet of fittingly moved pasta combination. Moving the combination precisely similarly simplifies it to seal the edges and encase your filling. Following being cooked, the ravioli should have the gentlest give as you snack into it, rather than a thick, crude chomp. 3. Coordinate the stacking with the sauce. You can organize ravioli with v

Baked Pears

Image
  Trimmings 4 prepared pears (Bosc pears, Bartletts pears, or D'Anjou pears) 1 lemon, zested and pressed 1 vanilla bean ½ cup unsalted margarine 2 teaspoons ground cinnamon 1 teaspoon cardamom ¼ cup natural shaded sugar 1 Preheat the oven to 375 degrees Fahrenheit. 2 With a vegetable peeler, strip the pears. 3 Cut the pears down the center. 4 With a melon superstar or teaspoon assessing spoon, take out the pear seeds. 5 Pour the lemon juice over the cut pears. 6 Part the vanilla bean and take out the seeds. 7 In a container on the burner over medium power, break up the margarine. 8 Add the lemon punch, cinnamon, cardamom, vanilla bean seeds, and natural shaded sugar to the mellowed spread. 9 To the lower some portion of a baking dish, add the mellowed spread mix. 10 Top the condensed spread mix with the pear parts, cut sides down. 11 Spoon a part of the spread mix over the pears. 12 Set up the pears until they are sensitive yet hold their shape, about 30 minutes. Spoon the spread a

Baked Pear

Image
  What Are Baked Pears? Baked pears imply any pear that gets ready in the oven, whether it's a plain pear or a pear in puff cake. Baking pears presents their ordinary sugars and smooth the normal item, achieving a dish like baked apples. Add flavor to baked pears with warm flavors, maple syrup, gritty hued sugar, red wine, or lemon juice to enhance the pear's standard loveliness. 3 Foods to Serve With Baked Pears Baked pears are fragile and sweet. Serve the dish with separating yet comparing flavors and surfaces. Coming up next are three food sources that pair well with baked pears: 1. Greek yogurt: Flavor plain Greek yogurt with vanilla concentrate and maple syrup or honey, then, spot it on top of or near a baked pear. The pungency of the Greek yogurt changes the concentrated charm of the pear and adds a smooth surface to the treat. 2. Toasted nuts: Use walnuts, pecans, cashews, or hazelnuts to add a crunchy surface and nutty, dirty flavor to baked pears. Gently toast the nuts

Cranberry Scones Recipe

Image
  Trimmings 1 stick cold unsalted spread 2½ cups customary flour, as well as something different for cleaning ½ cup granulated sugar 1 teaspoon salt 2 teaspoons baking powder ½ teaspoon baking pop ¾ cup buttermilk 1 tablespoon lemon punch 1½ cups dried cranberries 2 tablespoons profound cream, for brushing 1 Using a case grater, crush the spread into a little bowl and move to the cooler to chill. 2 In a gigantic bowl, combine the flour, sugar, salt, baking powder, and baking pop. 3 Add the infection margarine to the dry trimmings, and use a fork or cake blender to delicately press the spread into the flour mix until it structures coarse pieces. It's OK expecting a couple of small amounts of margarine remain. 4 In a tremendous assessing cup, blend the buttermilk and lemon punch together, then, pour over the margarine and flour mix close by the dried cranberries. 5 Blend everything alongside a wooden spoon as of not long ago joined and no dry spots stay, taking thought not to overmix

Tips for Cranberry Scones

Image
Keep the trimmings chilled. Margarine adds lavishness and flavor to heated products, and moreover expects a critical part in their plan. For the flakiest cake, try to keep the spread frozen preceding mixing, and chill the combination again before baking. Use a rich confining liquid. This recipe calls for buttermilk, but significant cream, cream, and full-fat coconut milk are exceptional substitutes. The extra fat makes for a fragile piece with new corners. Skim, almond, and other light milk decisions aren't unimaginable competitor for this recipe. Do whatever it takes not to debilitate the blend. Mixing and kneading are the two exercises that cultivate gluten, which makes for chewy breads instead of sensitive, cakey scraps for scones or rolls. Mix hitter softly with a wooden spoon, and pat gently while trim to keep away from obsessive worker conduct. Brush with cream. While various prepared products require an egg wash, significant cream will credit a not such a lot of shining yet

Vegan Blueberry Muffins Recipe

Image
  1 cup unsweetened almond milk, soy milk, or oat milk 1 teaspoon squeezed apple vinegar ¾ cup granulated sugar ⅓ cup canola oil 1 teaspoon vanilla concentrate 2 cups normal baking flour 2 teaspoons baking powder ½ teaspoon salt 2 cups blueberries Turbinado sugar or coconut sugar, for embellish (optional) Note: The full scale time rejects 15 minutes of inert time. 1 Preheat an oven to 375 degrees Fahrenheit and line a 12-cup bread roll skillet with paper liners (or oil the bread roll tin with nonstick sprinkle). 2 In a little bowl or assessing cup, combine the almond milk and squeezed apple vinegar. Put the liquid to the side to coagulate for 10 minutes. 3 In a tremendous bowl, add the sugar, canola oil, and vanilla concentrate and blend to join. 4 Add the vinegar-milk blend to the wet trimmings and blend to solidify. 5 In a medium mixing bowl, whisk together the flour, baking powder, and salt. 6 Add the dry trimmings to the wet trimmings and blend until a smooth hitter structures. Be

Tips for Making Vegan Blueberry Muffins

Image
Whether it's your most essential time making muffins or you're learned in vegan baking, follow these tips to make the best vegan blueberry muffins. Use new or frozen blueberries. New blueberries will make the best muffins, but frozen ones work when totally important. Before adding frozen berries to the hitter, wash them under room-temperature water, license them to rest in a colander for 30 minutes, and totally clear them off with a paper towel. Investigate various roads in regards to expansions. Change this fundamental recipe to consolidate your main roll add-ins like normal items (like raspberries and blackberries), hacked nuts (like pecans, walnuts, and cashews), chocolate chips, cocoa powder, and lemon punch or lemon juice. Exchange the canola oil for melted and cooled vegan spread for a denser bread roll. Use melted coconut oil for a subtly coconut-improved roll. Change the flour. Make a group of without gluten muffins by exchanging out the normal flour for a 1-to-1 sans g

Cranberry Cheesecake Recipe

Image
Trimmings For the structure: 2 cups gingersnap treats ½ stick unsalted spread, broke up ¼ cup sugar For the filling: 32 ounces (4 blocks) cream cheddar, room temperature 1 cup granulated sugar 1 teaspoon authentic salt 8 ounces crème fraîche, room temperature 2 teaspoons vanilla concentrate 3 gigantic eggs, room temperature For the fixing: 1 cup water 1 cup granulated sugar 1 cup caster sugar or superfine sugar 1 could cranberry anytime sauce Punch from one orange Preheat the oven to 350 degrees Fahrenheit. Make the body. Place the gingersnaps in the bowl of a food processor and heartbeat into scraps. You should have around 1½ cups of pieces. Move the pieces to a gigantic bowl. Pour the condensed spread over the pieces and add the sugar. Blend until especially solidified. Press the mix into a 9-inch springform dish and use a level surface gadget, like a spatula or assessing cup, to press the covering into an even layer, working it around 1 inch or so up the sides of the skillet and acr

Ways to prepare Cranberry Cheesecake

Image
  This is the way to make the best, creamiest cheesecake at home. Temper the ingredients. To guarantee a smooth and creamy surface, make sure all of your ingredients for the cheesecake filling are at room temperature. Assuming the cream cheddar or eggs are excessively cold while mixing, the filling will remain bold and you won't attain that classic smooth surface. Blind bake the crust. The surfaces at play in a cheesecake are part of what make it such a remarkable sweet. Since the actual cheesecake is baked at a lower temperature, the way in to a new crust is blind baking it before filling to guarantee a crunchy surface that will stay that way as the cake bakes. Use a springform pan. A springform pan has removable sides, making the release and reveal of the cheesecake sans hassle. The last thing you want to do is flip this cake over, so make sure to have the right pan to manage everything. Do whatever it takes not to skip the water bath. It may feel like an extra advance, yet the w

Pav Bhaji

Image
  1 tbsp + 1 tbsp spread 3 to mato (finely hacked) ¼ cup peas/matar ½ capsicum (finely hacked) 2 potato (gurgled and squashed) 1 tsp salt 1 tsp + ¼ tsp kashmiri red stew powder/lal mirch powder ¼ tsp turmeric/haldi 1 tsp + ½ tsp pav bhaji masala 1 tsp + 1 tsp kasuri methi/dry fenugreek leaves 2 tbsp + 1 tbsp coriander leaves (finely hack ped) 1 tsp ginger garlic stick 1 onion (finely hacked) ½ lemon juice 3 drops red food tone (optional) water to change consistency to toast pav: 8 pav/bread roll 4 tsp spread ½ tsp kashmiri red stew powder/lal mirch powder ½ tsp pav bhaji masala 4 tsp coriander leaves (finely hacked) in a huge kadai, without skipping a beat, heat 1 tbsp margarine and add vegetables. cook and pound well. by and by add 1 tsp stew powder, ¼ tsp turmeric, 1 tsp pav bhaji masala, 1 tsp kasuri methi and 2 tbsp coriander leaves. heat a tbsp of spread and add ¼ tsp stew powder, ½ tsp pav bhaji masala, 1 tsp kasuri methi. in like manner add 1 tbsp coriander leaves, 1 tsp ginger

Double-Crust Rutabaga Pie Recipe

Image
Trimmings For the pie outside: 2 cups customary flour ¼ cup granulated sugar ½ teaspoon salt 13 tablespoons unsalted spread, cubed and chilled ¼-½ cup ice water For the rutabaga filling: 2 huge rutabagas, stripped and diced 3 tablespoons olive oil 1 minimal yellow onion, diced 2 carrots, diced 1 garlic clove, minced 1 sound leaf 1 teaspoon maple syrup or light natural shaded sugar 2 teaspoons real salt 1 teaspoon dull pepper ½ teaspoon ground ginger ½ teaspoon ground nutmeg For the egg wash and assembling: 1 gigantic egg 2 tablespoons water (or milk) Note: The total time bars 45 minutes of torpid time. Make the pie dough: In the bowl of a food processor, add the customary baking flour, sugar, and salt. Beat the food processor to join the dry trimmings. With the food processor running, add the infection spread 1 tablespoon at a time. With the food processor running, add the ice water 1 tablespoon at a time until the dough starts to group together. (You may not need all of the ice water.

Rutabaga Pie

Image
  Rutabaga pie is a tasty pie including rutabagas, regularly without gluten and low-carb root vegetables. There are many kinds of rutabaga pie recipes: You can make a twofold covering pie with a diced rutabaga filling or a rutabaga shepherd's pie featuring beat rutabaga on top of arranged ground meat and vegetables instead of pureed potatoes. In case you have a sweet tooth, have a go at making sweet rutabaga purée pie, which resembles sweet potato pie or pumpkin pie. Regardless the sort of rutabaga pie you pick, coordinate the root vegetable with warm flavors to draw out its regular flavor. Ways of making Rutabaga Pie Rutabagas are superior to white potatoes, making them a magnificent delightful pie filling fixing. Use the tips underneath to suitably and safely plan rutabagas for pie: Strip the rutabagas before cutting. Rutabaga skin is unpalatable, so strip the vegetable before cutting and dicing it. Use a vegetable peeler instead of a sharp edge because the sharp edge could stick

Inari Sushi Recipe

Image
  Trimmings 1 can inari age (inarizushi no moto) 1 cup sushi rice 1 tablespoon rice vinegar 1 tablespoon sugar ½ teaspoons salt Cook the rice in a rice cooker, according to the maker's rules. This movement ordinarily expects 15 to 20 minutes. Channel the excess liquid from the tofu pockets into a little bowl; set the pockets aside. Combine the rice vinegar, sugar, and salt in a little bowl, and speed to deteriorate the sugar and salt. Shower the mix impartially over the cooked rice, then, at that point, use a rice paddle or spatula to wrinkle it into the rice. (Do whatever it takes not to blend since it will make the rice delicate or supple.) Taste and change contingent upon the circumstance. Permit it to cool to room temperature. Wet your hands with a bit of the liquid from the inari can and approach the painstakingly pre-arranged rice into a little, hardly oval rice ball. Delicately fit it inside the pocket, and polish it off with more rice contingent upon the circumstance. Go ov

What Is Inarizushi

Image
Inarizushi, or inari sushi, is a Japanese dish containing sushi rice stuffed inside burned tofu pockets (generally called aburaage or seared bean curd) that have been cooked in a dashi stock forward blend. Hand created inarizushi is made by stewing cooked tofu pockets (generally called aburaage or burned bean curd) in dashi stock ready with sugar, mirin, and soy sauce, making them sensitive and delicious, with essentially a hint of enjoyableness. The overflow liquid is then squashed from the pockets before they are stacked up with arranged sushi rice. Inarizushi gets its name from the Shinto master of agriculture, Inari. Aburaage was usually brought to Inari sanctums in Japan as a proposing to the god's fox dispatches; it turned out to be notable later to fill these pockets with rice. The energy of inarizushi changes to some degree by region. Osaka-style inari takes its three-sided shape from a fox ear, while Tokyo-style inari's shape seems to be a sack of grain or a totally fi

Backstrap Recipe

Image
Trimmings 2 teaspoons new rosemary, hacked 1 teaspoon genuine salt ½ teaspoon dull pepper ½ teaspoon garlic powder ½ teaspoon onion powder 1 venison backstrap tenderloin 1 tablespoon olive oil 2 tablespoons unsalted spread Note: The total time rejects 30 minutes of inactive time. Make your dry rub. In a little bowl, whisk together the rosemary, salt, pepper, garlic powder, and onion powder. Pat the backstrap down with a paper towel to take out any excess moistness. Using your hands or a cake brush, brush the meat with olive oil. Sprinkle the dry rub over the backstrap and manipulate it into the meat. Rest the meat at room temperature for 15 minutes. Preheat the oven to 375 degrees Fahrenheit. In an enormous cast-iron skillet or grill safe frying pan over medium-extreme focus, break down the margarine. Place the tenderloin in the hot dish and burn each side until cooked, around 1-2 minutes for each side. Move the skillet to the oven and plan until within temperature of the backstrap ext